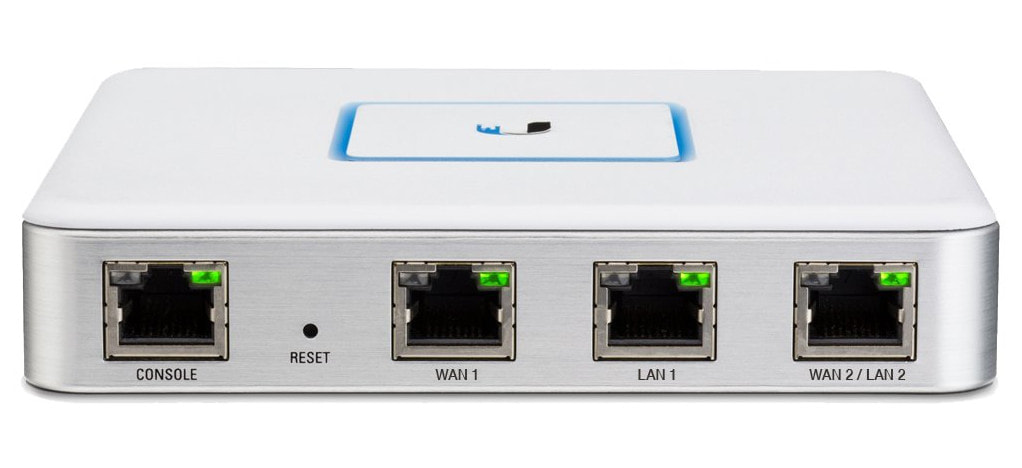
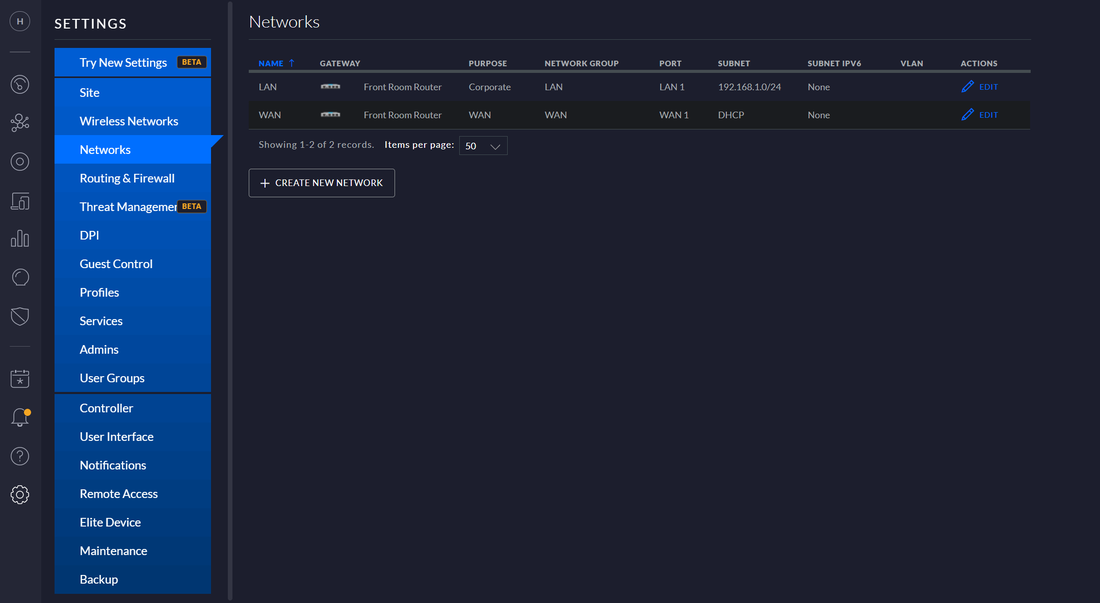
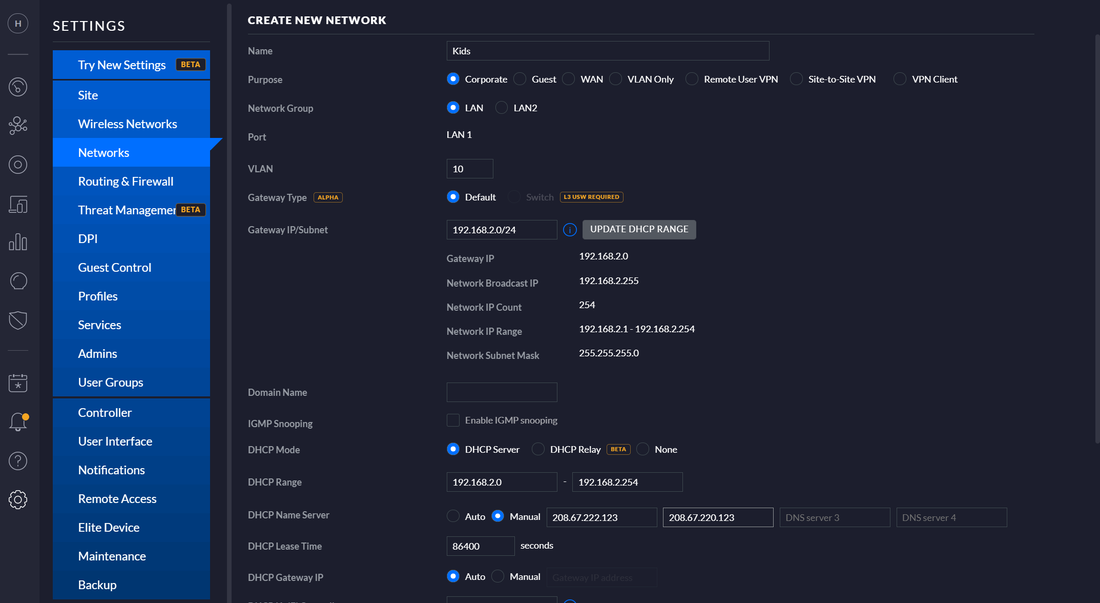
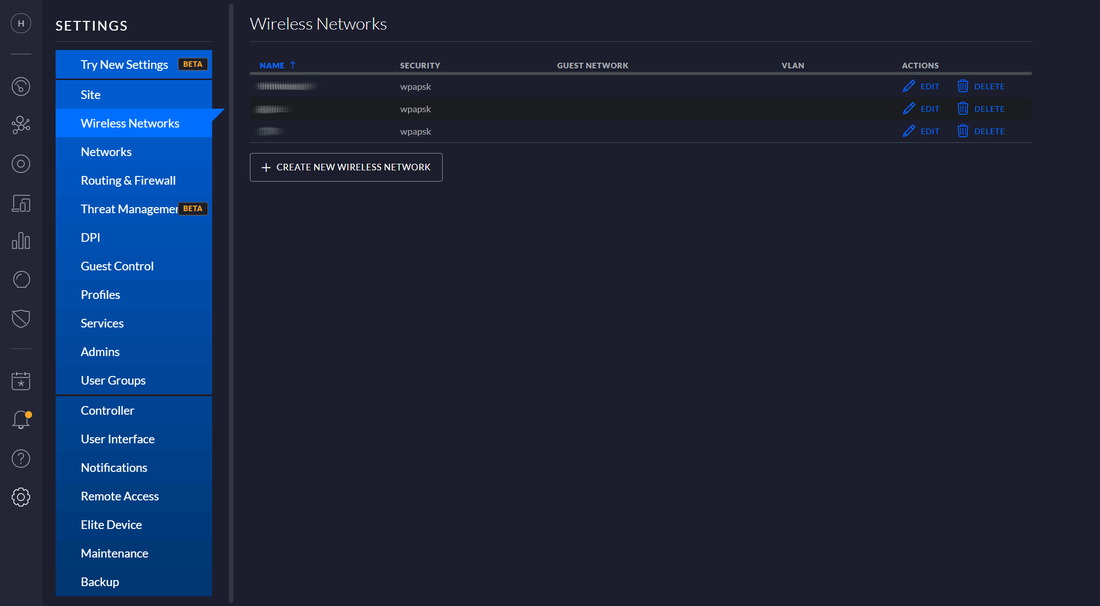
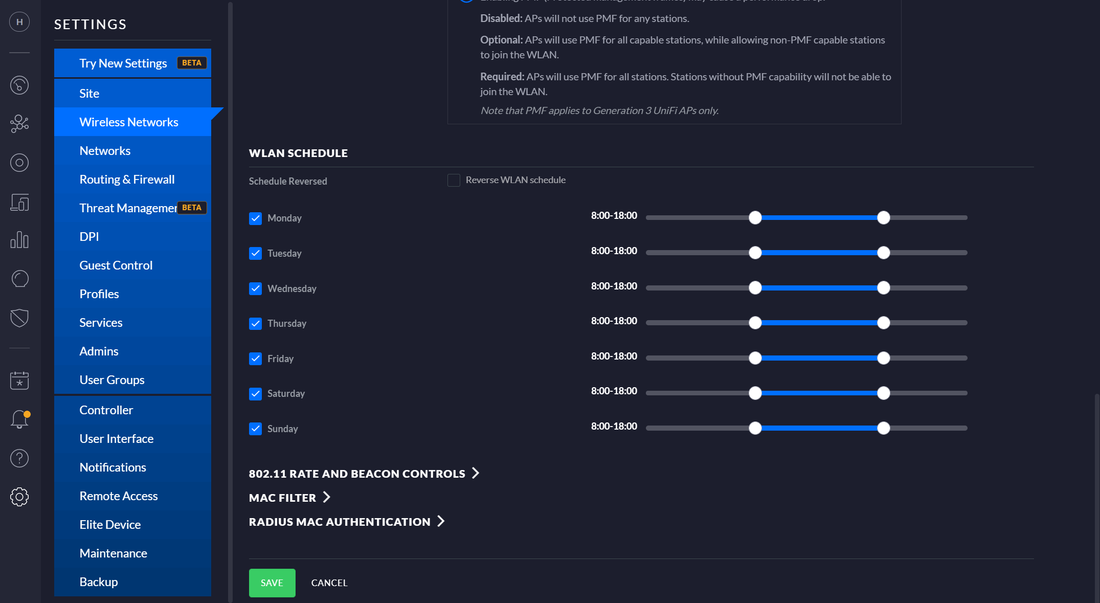
How to set-up content filtering and WiFi timings with UnifiKeeping our children safe from harmful online content is a priority for parents, the internet can be a scary place. As well as shielding our kids sometimes we just want them to switch off and get to bed. Well the good news is with Ubiquiti's Unifi Range you can provide your children with their own dedicated WiFi network, with content filtering and timings. In this guide we are going to show you how to set it up. Rather watch the video guide? Check out our YouTube Video Instead. For more Unifi tips and other relevant comment why not subscribe to our channel. What Unifi Equipment do I need for content filtering?There are a few pieces of equipment that you'll need before you can set up you children's content filtered and timed WiFi. In this guide we are going to be using solely Unifi equipment. However the good news is that you don't necessarily have to use Unifi or even Ubiquiti, setting up these kind of features is possible with most professional networking brands. In this guide we are using Family Shield as the content filter, this is a free service provided by Open DNS. Details of the service can be found here. The service is not configurable, but there are other family protection services available. 1. Unifi RouterAs you may know Unifi don't call their routers, routers. The Unifi Security Gateway and the Dream Machines (regular and Pro) are all routers. Ubiquiti also have a range of other routers such as the Edge Routers which they do call routers. Confusing! The UI for the edge routers is different so we won't be using those in this guide. We are going to be setting up a Virtual Local Area Network (VLAN) so we need the router. Without a router it is still possible to install the timings, but you can't install the content filtering. As mentioned above, it doesn't necessarily have to be a Unifi Router but for that is what we are covering in this guide. 2. Unifi SwitchA managed switch allows the VLAN tag to be added to the Access Points. Again this doesn't have to be a Unifi Switch but to keep things simple that's what we are going to use in this guide. If you use an unmanaged switch (not Unifi) you may find that it strips the VLAN tag, not always an issue, but if you are struggling to get things to work and there is an unmanaged switch in your set up it may be causing the problem. 3. Unifi Access PointUnifi have a whole host of Access Points and this set-up can be done on any of them. If you already have your main network and a guest network, don't worry you can add another and keep those. 4. Unifi ControllerA Unifi Controller can be on a Cloudkey, on a PC/laptop, on a Server or even on a Raspberry Pie, wherever it is you will need access to it. How to Configure the Content filtering and WiFi Timing1. Setting up a VLANStage one will be to set-up the content filtering and the VLAN. Login to your Unifi Controller and select the following: - Settings (the cog at the bottom left of the page) - Networks - Create New Network Once you get to the New Network you need to fill in a few details, anything not mentioned below can either be left blank or with the settings already prefilled. Name: as you like the network as you like for example "Kids" Purpose: Leave as "Corporate" Network: "LAN" VLAN: Let's make this "10" Leave Gateway Type as: "Default" Gateway IP/Subnet: Assuming your main network is on 192.168.1.1 you can put this network on 192.168.2.1 and then enter "192.168.2.1/24". This will give your kids network 254 IP addresses which should be plenty. DHCP Range: 192.168.2.1 - 192.168.2.254 DHCP Name Server: 208.67.222.123 in the DNS server 1 and 208.67.220.123 in the DNS server 2 These are the Family Shield DNS Server which restrict the content. Make sure to press "Save" at the bottom of the page. You may notice your router is now provisioning (applying the settings). 2. Setting up WiFi NetworkStage 2 is setting up the WiFi network and, applying the VLAN and giving it a schedule. In the Unifi Controller select the following: -Settings -Wireless Networks -Create New Wireless Network Once you are into the options page for the new WiFi settings you need to add some information. Name/SSID: This is the WiFi Name that will be displayed, for example "Kids WiFi". Security: WPA Personal Network: Select the VLAN you just created in the last step, we called ours "kids" Once you've done these select Advanced Setting at the bottom to give more options. Schedule: Tick "Enable WLAN schedule". Schedule can be tricky to see, it's quite far down the list of options. Scroll down and you will see the WLAN schedule N schedule The schedule allows you to set the time on the WiFi network, it should be fairly self explanatory, the timings are drag and drop and the day they apply are on the side. The blue is when the WiFi is on. Once you have selected the timings don't forget to press Save at the bottom. Your Access Points will now provision. A few minutes and the Kids WiFi network will be up and running. Your Content Filter and timed Kids WiFi is up and Running.I hope you have found this blog useful. If you have please like, share and comment. If you have any questions pop them in the comments below.
5 Comments
|
Huw Jones
Owner of Home Network Solutions Berkshire Categories
All
Archives
May 2024

|

 RSS Feed
